For lots of us moms, breast milk is like magic – it’s full of good stuff that helps our babies grow strong and healthy, and it’s a beautiful way to connect with them. But here’s the thing: every mom’s journey with breastfeeding is unique. Sometimes, we end up with more milk than our babies need, and it feels like a waste to just throw it away.
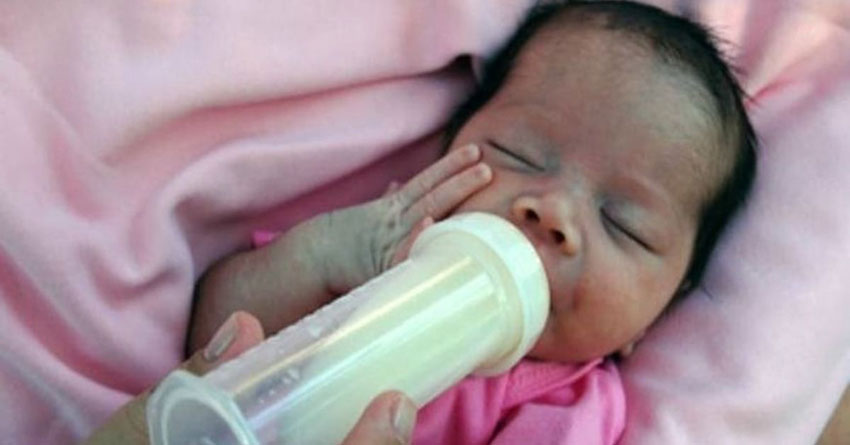
Ever wondered what to do with extra breast milk?
That’s where breast milk soap comes in! It’s this cool idea where you can turn your extra milk into soap. It’s not just practical – it’s also kinda sentimental, like a little reminder of the bond you share with your baby. Plus, it might even be good for your skin!
Now, I know what you’re thinking – soap from breast milk? Hear me out! Instead of tossing out that precious liquid gold sitting in your freezer, why not put it to good use? Maybe you’re like me, always on the lookout for ways to make the most of what we’ve got. And let’s be real, wasting perfectly good breast milk just doesn’t sit right with us. So, why not get a little creative and find a way to use up those leftovers?
Things to Consider for Breast Milk Soap
Before you dive into making breast milk soap, let’s consider a few important things:
Safety First: First off, safety comes first! Making soap means dealing with a chemical called lye (sodium hydroxide), which can be pretty harsh on your skin. So, make sure you’ve got gloves, eye protection, and plenty of fresh air when you’re working on your soap project.
Quality of Milk Matters: Next up, let’s talk about the milk itself. Only use fresh or frozen breast milk that’s still good to drink. Using old or funky-smelling milk could mess with the quality of your soap and might even make it a breeding ground for bacteria – yuck!
The Science: Now, onto the science stuff. Making soap is all about mixing together oils and lye to create a chemical reaction called saponification. Understanding how this process works is key to making sure your soap turns out safe and effective. Luckily, there are tons of resources out there, from online tutorials to beginner-friendly kits, to help you wrap your head around it.
Realistic Expectations: Last but not least, let’s keep our expectations real. Breast milk soap is more about the sentimental value than any magical skin-saving properties. Sure, it might make your skin feel nice and soft, but it’s not gonna work miracles. So, just enjoy the process and the special meaning behind it!
Why Make Soap From Breast Milk?
So, why would you want to make breast milk soap? Well, there are a few good reasons:
- Imagine having a bar of soap that’s not just any soap, but one made with your own breast milk. It’s like a little keepsake of your breastfeeding journey, something special memory you can hold onto for yourself, your baby, or even share with someone you love.
- Instead of tossing out extra breast milk, why not give it new life? Turning it into soap is a smart way to use up what you have and create something useful in the process.
- When you make your own soap, you’re in control of what goes into it. No funky chemicals or artificial stuff – just pure, natural ingredients that are gentle on your skin.
Breast Milk Soap Benefits
You might have heard people raving about how magical breast milk soap is, but it’s important to take those claims with a grain of salt. Here’s what we actually know:
First off, breast milk does contain some good stuff like fats and sugars that can make your skin feel nice and moisturized.
Some folks say that using breast milk soap feels soothing, especially if you have sensitive skin. But, to be honest, there’s not a ton of solid proof to back up that claim.
One thing’s for sure, though – breast milk soap is definitely one-of-a-kind! It’s a cool way to start conversations and celebrate the journey of motherhood.
But hey, let’s keep it real here. While breast milk soap might make your skin feel soft and smooth, it’s not gonna work miracles. It’s just soap, after all!
Now, if you’re ready to dive into the world of soap making, let’s get crafty and whip up some breast milk soap of our own!
Choosing Your Method: Melt and Pour vs. Cold Process
So, when it comes to making soap, there are basically two ways to go about it: the melt and pour method and the cold process method.
Melt and Pour is like the beginner’s version. It’s super easy – you just melt down a pre-made soap base, mix in your breast milk and whatever else you want, then pour it into molds to cool.
Now, the Cold Process method is a bit more complicated. You gotta be careful with this one because it involves working with lye to make the soap from scratch. It gives you more control over what goes into your soap, but it’s definitely trickier and comes with more safety precautions.
In our article, we’re gonna stick with the melt and pour method because it’s safer and more beginner-friendly.
Essential Equipment:
Ready to dive into the world of soap making? Alright, here’s what you’ll need to get started:
Safety Gear: First things first – safety comes first! Make sure you’ve got rubber gloves, safety goggles, and long sleeves to protect your skin. And if you’re handling lye (which can be pretty harsh stuff), consider wearing a respirator for extra protection.
Scale: You’ll want to get your measurements just right, so having a precise scale on hand is key. It’ll help you whip up the perfect batch of soap every time.
Stick Blender: Want that smooth, creamy texture for your soap? A stick blender is your secret weapon. It’ll help you mix everything together like a pro.
Silicone Molds: Time to get creative! Choose from a bunch of fun shapes and sizes to make your soap uniquely yours. Whether it’s hearts, stars, or even dinosaurs – the sky’s the limit!
Glass or Stainless Steel Containers: These are your mixing buddies. Use them to combine all your ingredients, from breast milk to lye, and whip up your soap batter.
Sharp Knife: Once your soap is all set and done, you’ll need a sharp knife to slice it into perfect little bars. It’s like cutting into a cake, but way more satisfying!
Ingredients You’ll Need:
- Handle Lye with Care: Lye, also known as sodium hydroxide, is powerful stuff! Make sure you wear gloves and goggles when working with it.
- Choose Your Oils Wisely: Pick oils that work best for your skin type. Think olive oil, coconut oil, shea butter, and avocado oil – they’re popular choices for a reason!
- Say No to Tap Water: Stick with distilled water for your soap-making adventures. Tap water can mess with the process, so it’s best to avoid it.
- Fresh or Frozen Breast Milk: Whether it’s fresh from the tap or stored in the freezer, make sure your breast milk is safe for consumption before using it in your soap.
Extras to Spice Things Up:
- Essential Oils: Add a drop or two of your favorite essential oil for a lovely scent. Just make sure it’s safe for babies if you’re making soap for a newborn. Lavender, chamomile, and sweet orange are some popular choices!
- A Touch of Honey: Who doesn’t love a little sweetness? Honey can give your soap a subtle hint of sweetness and might even help boost its moisturizing powers.
- Oatmeal for Some Scrubbing Action: Want to add a bit of exfoliation to your soap? Ground oatmeal is your friend! It’ll give your soap a gentle scrubbing texture that your skin will love.
Breast Milk Soap Recipe:
Just a Quick Safety Reminder: This recipe I’ve shared is just a general guide. It’s super important to always double-check your measurements and be extra careful when dealing with lye. If you’re not feeling 100% confident, don’t hesitate to reach out to a soap-making expert or attend a workshop to get a better grasp of the process. Better safe than sorry, right?
Ingredients:
- 1 cup (240 ml) Olive Oil
- ½ cup (120 ml) Coconut Oil
- ¼ cup (60 ml) Shea Butter
- ¼ cup (60 ml) Avocado Oil
- 130 grams Sodium Hydroxide (Lye)
- 1 cup (240 ml) Breast Milk (fresh or frozen)
- Distilled Water (amount will vary depending on your chosen oils)
- Optional: Essential Oils (5-10 drops), Honey (½ teaspoon), Ground Oatmeal (1 tablespoon)
Instructions:
- Get your space ready: Make sure your workspace is tidy, airy, and clutter-free. Cover your work surface with newspaper for easy cleanup later.
- Gear up for safety: Put on your rubber gloves, safety goggles, and long sleeves to keep yourself protected. If you have one, consider wearing a respirator for extra safety, especially when dealing with lye.
- Measure out your oils: Use a scale to carefully measure each type of oil into a heat-resistant glass or stainless steel container.
- Handle the lye with care: Slowly add the lye to a separate container filled with distilled water. The amount of water you need depends on the oils you’re using, so it’s a good idea to double-check with a lye calculator. Be cautious because the mixture will get hot. Stir gently until the lye dissolves completely.
- Let things cool down: Allow both the lye solution and the oil mixture to cool to around 100°F (38°C). This might take about 1-2 hours.
- Blend it up: Using a stick blender, slowly pour the lye solution into the oil mixture while blending continuously. Keep going until the mixture thickens and becomes smooth like pudding.
- Look for the trace: Keep blending until the mixture reaches a stage called “trace.” You’ll know it’s ready when it leaves visible trails when dripped.
- Add some extras if you want: If you’re feeling fancy, you can stir in things like essential oils, honey, or ground oatmeal for extra benefits.
- Pour it out: Quickly pour the batter into your silicone molds before it starts to heat up again. The soap will warm up as it goes through the soap-making process.
- Let it cure: Loosely cover the molds with plastic wrap or a cardboard box to allow for some airflow. Leave the soap to cure in a cool, dry spot for at least 48 hours.
- Unmold and cut: Once the soap is cured, carefully remove it from the molds. Use a sharp knife to cut it into the sizes you want.
- Give it some extra time: Let the individual soap bars cure for another 4-6 weeks before you use them. This helps them harden up completely and last longer.
Oatmeal Variation:
To add a little extra something to your breast milk soap and give your skin a gentle scrub, try mixing in some finely ground oatmeal! It’s super easy – just follow your usual soap recipe, but right before it thickens up (we call this “trace”), toss in a tablespoon of ground oatmeal. That’s it! Your skin will thank you for the extra TLC.
Is The Soap From Breast Milk Good for Skin?
So, here’s the scoop: breast milk soap might make your skin feel nice and soft, especially if you’re someone with sensitive skin. But, we’re still waiting on more research to say for sure if it’s better than regular soap.
You see, breast milk has fats and sugars in it, which could make the soap a tad more moisturizing. And, some moms say it’s been gentle on their skin. But, let’s keep it real – these perks might not be super obvious and might not set it apart from other good-quality soaps.
Does Breast Milk Soap Need to be Refrigerated?
You don’t need to put breast milk soap in the fridge once it’s done (usually after 4-6 weeks). Here’s why:
When you make soap, something called saponification happens. It’s a fancy way of saying that the breast milk mixes with the lye and turns into soap. This process gets rid of most of the stuff in breast milk that could go bad, like bacteria.
Plus, cured soap doesn’t have much water in it, which isn’t great for bacteria. So, it’s not a cozy place for them to hang out.
To keep your breast milk soap in good shape, just store it in a cool, dry spot away from sunlight. A covered soap dish in your bathroom is perfect.
Conclusion
Breast milk soap is a neat way to remember your breastfeeding journey or make a special gift. It might not do miracles for your skin, but the sentimental value and the joy of making your soap are worth it. Safety is super important! If you’re new to soap-making, it’s smart to learn the ropes first. Consider taking a class or doing some research before jumping in.
So, mamas (and anyone else curious!), are you thinking about trying breast milk soap? Let me know your thoughts in the comments below!
Additional Resources:
Soap Making Resource: http://www.soap-making-resource.com/
Lye Calculator: https://www.soapmakingfriend.com/soap-making-recipe-builder-lye-calculator
Disclaimer: This article provides general information only and is not a substitute for professional medical advice. Always consult with a healthcare professional before using any new product on your skin, especially if you have any pre-existing skin conditions.
Sources:
- How To Make Breast Milk Soap: https://www.bellybelly.com.au/breastfeeding/breast-milk-soap/
- DIY Breast Milk Soap Bars: A Complete Guide: https://www.wikihow.com/Make-Breastmilk-Soap
- How To Make Breast Milk Soap: https://mumsgrapevine.com.au/2023/08/diy-breastmilk-soap/
- How to Make Breast Milk Soap: https://tweakandtinker.net/how-to-make-breast-milk-soap/

Hi, I’m Lindley! I’m a stay-at-home-mom sharing all of the tips and tricks I learn throughout my motherhood journey. I’m now navigating through wife life and being a mom while blogging my crazy adventures. I’m so glad to have you along for the ride!